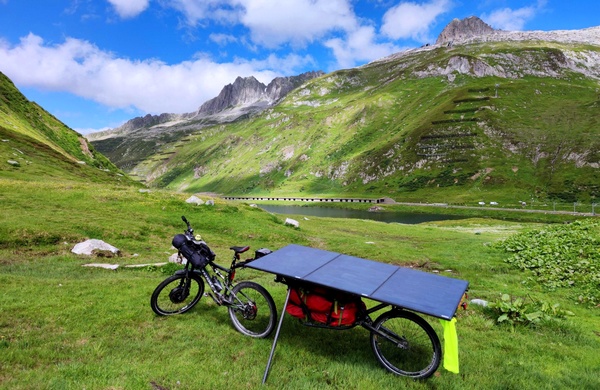
Here is my reflection on the assembly of a bicycle and a single-wheel trailer, the idea being to prepare a long trip in total autonomy, in terms of logistics and electrical production. It involves traveling for several weeks, a few months and covering several thousand km. The roads are varied, from bitumen to the track, sometimes taking the paths. So I established precise specifications before designing the beast.
Technical presentation
Specifications
- Weight: the enemy of the cyclist! For my part, the assembly equipped to travel independently weighs 63 kg. Ideally, I didn’t want to exceed 60 kg.
- Trajectory: a bike with a single-wheel trailer allows me to have only one trajectory to monitor, I avoid holes, stones and other obstacles. I can afford single tracks without too much risk.
- Wheel model: 3 identical rims for the set, same tires, same inner tubes, same rims, it only the departments differ
- Quality: my uncle René used to tell me “You have to be rich to buy cheap”, we buy the same low-cost product several times to end up buying a better quality product or… abandoning the project. So I identified brands and suppliers that had proven themselves at other events. Simple and without (too) much risk.
- Homogeneity: as far as possible and especially on the electrical part, I avoid assemblies of components that do not or do not communicate well with each other. Reliable and proven electrification (even by others) saves me a lot of trouble.
- Budget: Closely linked to the previous point, let’s be realistic, a quality and reliable assembly comes at a cost. ge at nearly €8,000.
- Gearbox: instead of chainrings/derailleur/cassettes. This is not a detail since the installation of this element in the hub of the rear wheel forces me to make a choice. Install a bottom bracket or wheel motor, either in the front wheel of the bike or in the wheel of the trailer.
- Safety: riding fast and far is good. Knowing when to stop is better! So I chose brakes that lived up to what was expected of them. 143 kg at 60 km/hour downhill and 50 m from a hairpin, you have to be comfortable with your brakes… or unconscious. I chose to love life. For the tires and the lighting, same reasoning, I don’t look at the expense.
Bike and components
Bike
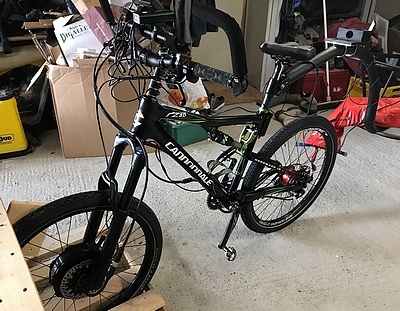
- Bicycle: my trusty Cannondale RZ One 40 in carbon, offered for my 50th birthday (12 years old already!). Light (12kg), fully suspended, solid and above all, already in my possession! The bike accepted without too much difficulty the few modifications that were necessary for the anticipated configuration.
- Fork : originally the famous Lefty Carbon, an efficient single-arm for a MTB use but much too fragile and moreover, it is mechanically impossible to install the wheel motor on it. So I simply got the FOX fork from my Giant Trance E+2 e-MTB, a solid fork designed to withstand the mechanical stress imposed by the engine, braking and weight.
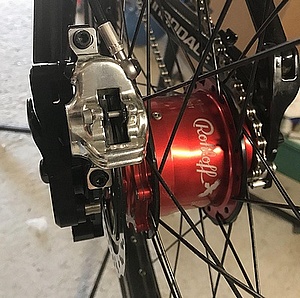
- Gearbox: a Rohloff hub, frankly, it will be difficult for me to go back to a classic derailleur system. This Rohloff is incredibly precise, the 14 speeds are perfectly staged and progressive. Quality at a price but you now know the adage.
- Chain and sprocket: this is one of the trickiest points, I first fitted the bike with a 36-tooth chainring and a 16-tooth sprocket teeth. The pedaling rate was too fast, I couldn’t keep up, for a few euros I bought Rohloff sprockets of 15, 14 and 13 teeth, to test. As a test, I left for 2,500 km and 25,000 D+ in 36/13. I’m not saying ribs over 15% were easy but I got there. One of these days I will install a 14 sprocket to see.
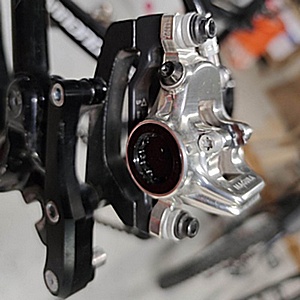
- Brakes: progressive and powerful. A Magura MT8 Pro caliper at the rear, double pistons, “1 finger” brake lever and pads of the same brand. For the front, no compromise, a Magura MT7 Pro caliper, four pistons, double pads and Magura MT5E brake lever with switch, to deactivate the engine during braking. Magura pads, of course. MT 8 Pro on the front, MT7 on the back.
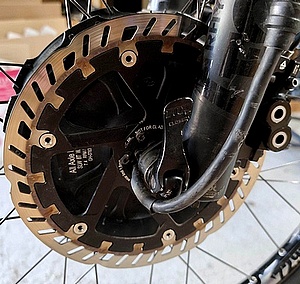
- Brake discs: another sensitive subject! After trying (and scaring myself!) with a 180mm Magura MDR-P E-Bike 6-Hole disc up front, I quickly switched to a 220mm Magura MT eStop Optimizer. Nothing to do with braking: you stop quickly and safely. For the rear, no choice, a specific Rohloff 4-hole disc. No big deal, it’s a special Magura 203mm disc that does its job very well.
- Pads: a pair of Magura MT 7.P Performance 2-piston rear pads. 20% wear after 2,500 km! Magura MT 9.P Performance 4 Piston pads at the front. Wear … 90%, provide reserve!
- Wheels and tires: Mavic 729 Disc rims 36 spokes in 26 inches, sapim e-strong spokes (three different sizes: front wheel bicycle, bicycle rear wheel and trailer wheel). Schwalbe Rigid Pick-Up Super Defense Fair Rubber 26″ 2.35 tires, special for e-cargo bike. Michelin MTB C4 AIRCOMP Latex inner tube 26×1.9/2.20 Presta valve
- Saddle : an Italia ST 7, it has not moved, the gel has not collapsed, on the other hand, even if I chose it from 5 saddles tested, it is not yet the saddle that will make me forget my behind. A Brooks saddle or the removal of the seat bones? I’m still hesitating.
Trailer
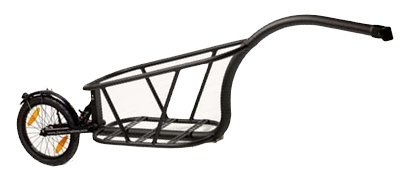
An aluminum Aevon STD 100, light (7kg) with a loading capacity of up to 145 litres. The clip is on the seat post, I can turn around without setting foot on the ground. The main adaptation concerns the swingarm which originally accommodated a 16-inch wheel. As my specifications require me to have three 26-inch wheels, I lengthen the aluminum fork arms by a few cm. 26” Mavic 729 rim and 36 Sapim e-strong spokes. Schwalbe Rigid Pick-Up Super Defense Fair Rubber 26″ 2.35 tire, special for e-cargo bike. Michelin MTB C4 Aircomp Latex inner tube 26×1.9/2.20 Presta valve.
Supporting structure of the panels
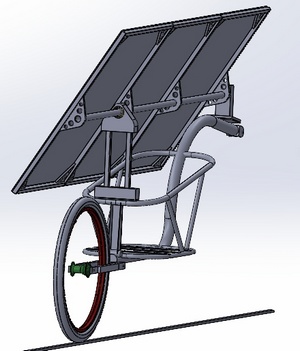
Initially I imagined and drew it with CAD software. Assembly of the panels on a pivoting axis, all on a structure fixed to the chassis of the trailer. Let’s go back to the structure and adaptation to the trailer chassis. First, I design 3 carbon tube frames. Each panel is therefore attached to its own frame. Each frame being assembled to its neighbour. The advantage is that during disassembly, the size of the panels is considerably reduced and a tip (one more, gift!), the dimensions of the frame are slightly larger than the panel.
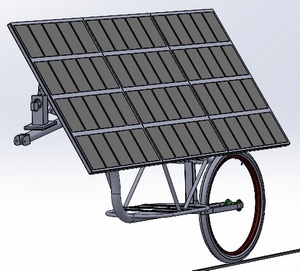
Which, in the event of shocks, friction or falls (tested for you, when stationary and twice, the contributor not reluctant to face the effort!) avoids damaging the panels this at the risk of amputating the production of precious Watts. Frames constructed with 20x20mm square section carbon tubes. Sections cut at 45° to a length greater than the dimensions of the panel. Assembly with 3D printed square inserts in PLA, glued with two-component epoxy in a syringe. Total dimension of the three assembled panels: 930 mm in width and 2010 mm in length.
>>> Detailed presentation of the construction of the supporting structure of the panels
Presentation of the electrical system
There are writers, creative dreamers, mathematicians, do-it-yourselfers, pros and there’s me. I look at an electrical outlet and I take a shock, it’s like that, neither the doctors nor the shrinks understand, “Have to deal with it, Monsieur Lebrun”. So I thought about an effective method, within my intellectual and financial reach. I looked who, in France not too far from my home, had some references and achievements that seemed to me effective & seductive. I also have this ability to trust fairly quickly as long as the current passes (a little pun that scholars will have already spotted). I also checked that all of the supplier’s components could easily communicate with each other. I contacted Déclic’Eco and in particular its manager Guillaume Devot.
- an “All Axle Hub Motor 7.5 rpm/V” motor from Grin Technologies, installed in the front wheel, lighter than its competitors, it also heats up less, I like it I noticed and it has a good regeneration of current.
- a controller Baserunner Z9 (Grin Technologies), now in version 5 (V4 having let me down)
- a console Cycle Analyst V3 (Grin Technologies)
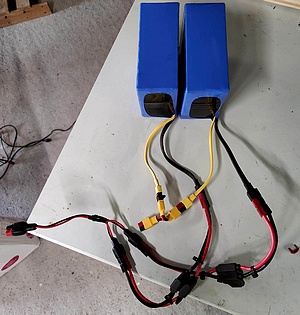
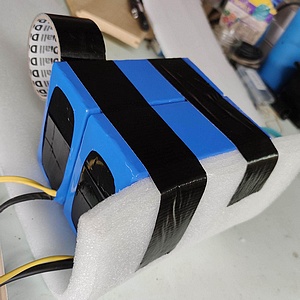
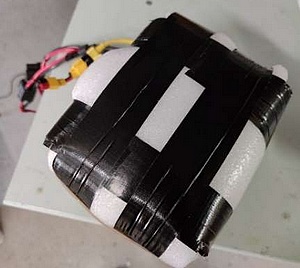
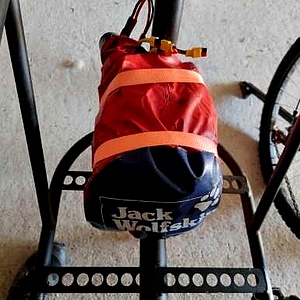
- 2batteries Li-Mn 48Volts 14 Ah each. Regarding the batteries, heat is not a real problem, you should not put them in direct sunlight either, that’s for the panels! On the other hand, they do not love shocks. I made them a cozy bed that I delicately slip into a waterproof bag, itself strapped to the trailer.
- 3 solar panels Sunpower of 115 Wp each
- 3 solar regulators MPPT 48V/36V economical (including one in reserve). You will only see two in the photos. Indeed, 1 regulator is able to manage 2 panels. The panel at the front has its regulator, the other two at the back have theirs. Indeed if I shade the 1st panel, the production is strongly affected but I only lose ⅓ of production at most.
Guillaume Devot manufactures the electrical network to measure, you just have to send the photos and the said measurements. As for assembly, it is relatively simple, there is no real way to make mistakes, the lugs and cables are identified and/or equipped with polarizers.
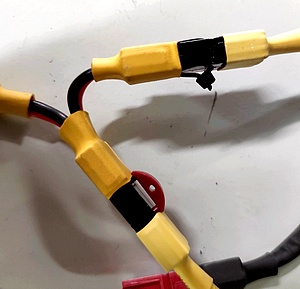
Tip and trick: the connectors can disconnect quite easily, there are specific small parts that prevent disconnection. I use Rilsan for connections that are never or very rarely used. Here are the two solutions. For wiring, make sure you have enough good quality Rilsan style cable ties. When all this is in place, you download the application (software paragraph) on your PC, you connect the PC to the Baserunner with the USB cable, this will allow you to configure your configuration, by telephone for my part, with Guillaume Devot.
In addition to these products, I have installed:
- a 48 V to 12 V DC voltage converter which supplies 12V to the two rear headlights
- a 12V to 5V voltage regulator DC converter to have 2 additional USB sockets
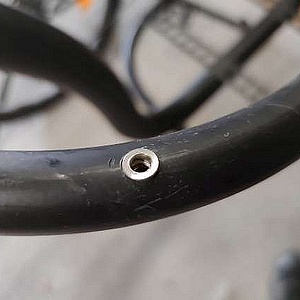
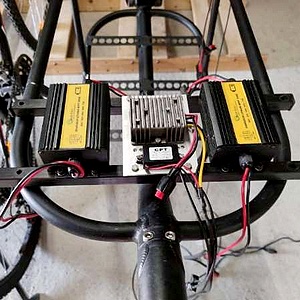
Specific tools: a riveter for inserts which was very useful to me, especially for attaching certain parts to the trailer. Example: installation of MPPTs and voltage converters on a frame attached to the trailer.
Electrical diagram

Accessories
- powerful rear light.
- bell-that-makes-a-real-ring-ring, very good.
- self-adhesive reflective tape. Sticking them on is fine, taking them off is misery, they come apart.
- padlock, light and strong since rated 6 on a scale of up to 10.
- fire rear with built-in alarm, not bad when I sleep on the first floor and see my bike in the ground floor courtyard.
- magnetic phone holder. Good product, solid.
- specific pump for shock absorbers (bicycle and trailer).
- adapters for Presta to Schrader bicycle valve.
Author: Richard Lebrun (email: riclebrun@gmail.com)